Drawing has been proven to be a highly beneficial activity for our personal development. It allows us to enhance our memory, creativity, problem-solving skills… However, when we want to start in this world, we often encounter a wall that takes away our motivation.
Many websites assume that you already know many things, which may not be the case. That’s why, at Not Hamlet Design, we will create a series of articles to help you take your first steps into this world.
Our first brushstrokes will be a general introduction that we will later delve into more deeply.
Essential Drawing Tools
When I first started in the world of drawing and looked for articles like this, they always recommended a bunch of materials that were completely unnecessary as an initial expense.
The truth is, for drawing, you only need three things: something to draw with, a surface to draw on, and yourself, as you will be the one creating the artwork.
With just a pencil and paper, you can create your own illustrations. Of course, in the future, more tools may be necessary, but for now, as beginners, it’s best to learn to use the basics well before moving on to the next level.
Here’s a list of materials for more information, but remember that whatever you have will work:
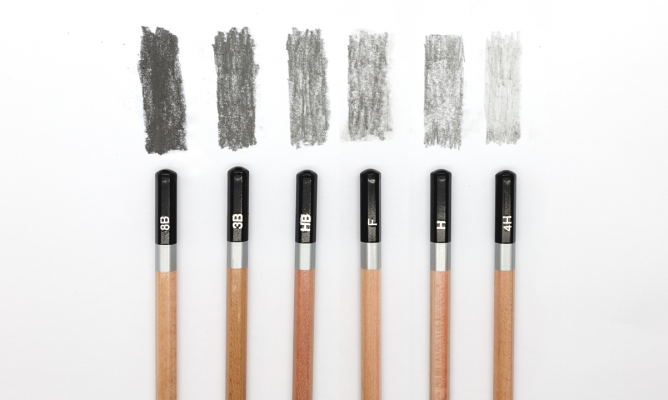
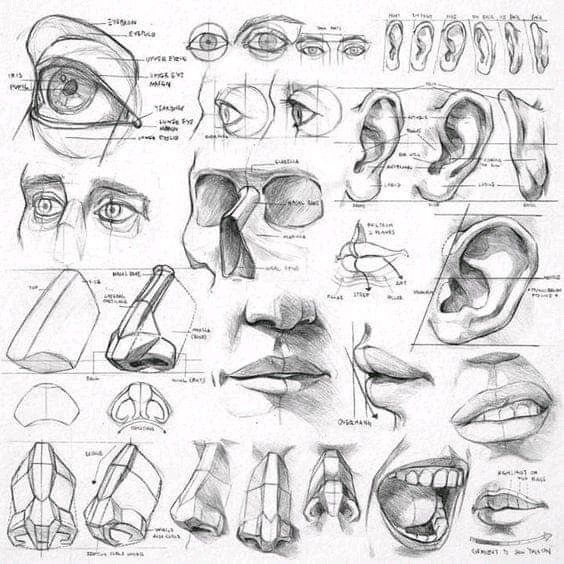
- Drawing Pencils: Pencils are the soul of drawing. They come in different hardness levels, identified by letters or numbers, indicating the softness of the graphite. The most common pencils are HB, which are considered medium hardness. If you want darker lines, opt for pencils with a lower number (for example, 2B or 4B), and if you’re looking for lighter lines, choose pencils with a higher number (for example, 2H or 4H).
- Drawing Paper: The right paper is crucial to achieving good results in your drawings. Look for drawing papers that are sturdy and smooth to the touch. Textured papers (like medium grain paper) are ideal for dry media like graphite and charcoal. There are also papers specially designed for wet media like watercolors.
- Eraser: A good eraser is essential for correcting mistakes and fine-tuning details in your drawings. White erasers are suitable for removing lines and strokes, while kneaded erasers are ideal for creating light and shadow effects through blending.

- Pencil Sharpener: It’s important to keep your pencils sharp for precise and detailed lines in your drawings. Opt for a sharpener with a metal blade to avoid the graphite from breaking during sharpening.
- Ruler: A ruler is useful for creating straight lines and precise measurements in your drawings. There are also rulers for drawing curved lines, which can be helpful in many situations.
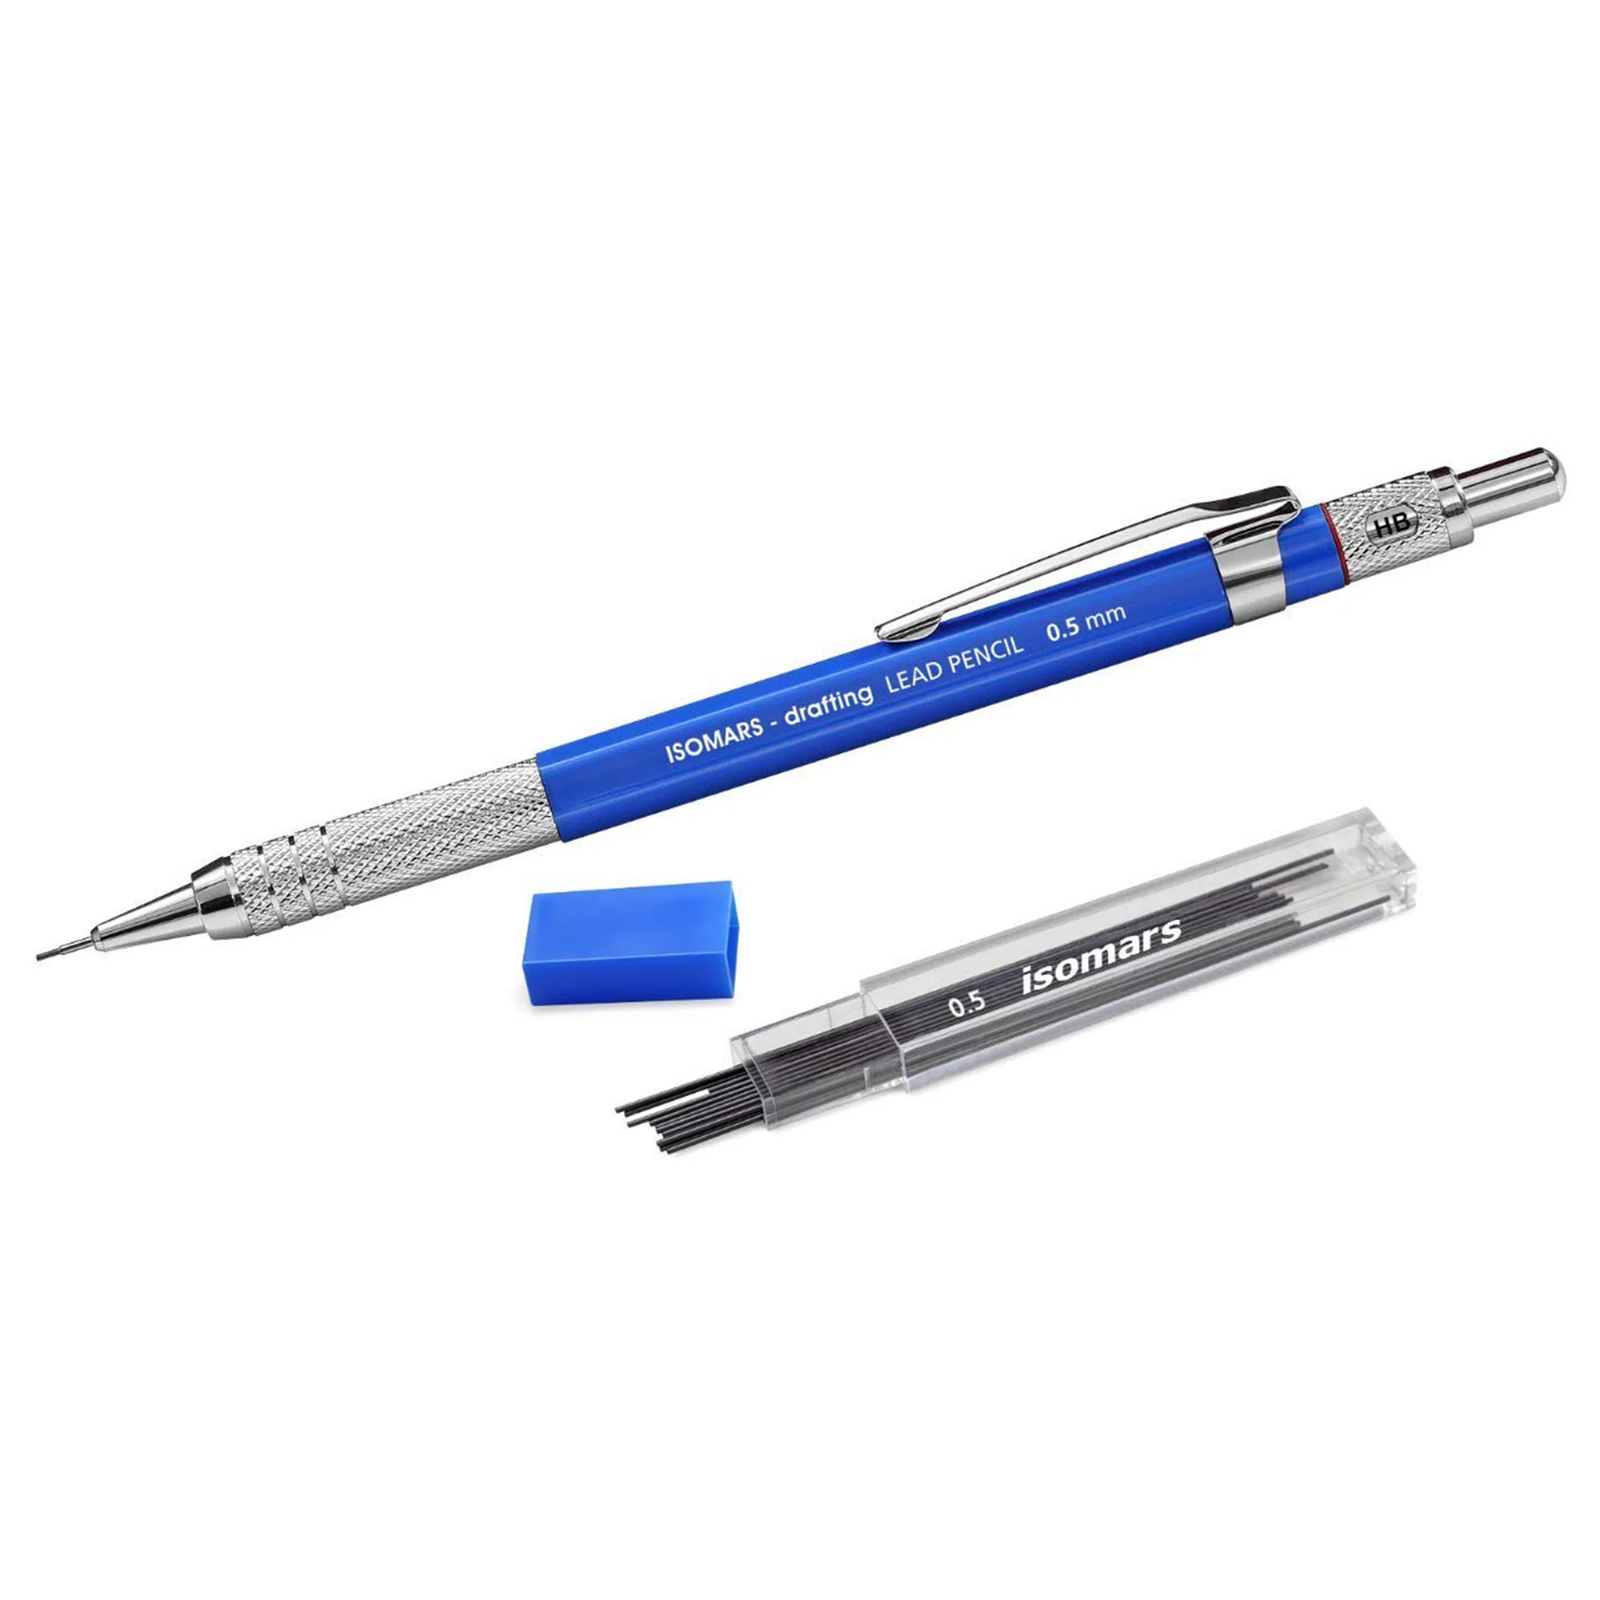
- Mechanical Pencil: If you prefer working with defined and clean lines, consider using a mechanical pencil. These mechanical pencils allow you to have a more consistent and sharp stroke in your drawings.
- Drawing Board or Firm Surface: It’s important to have a stable and firm surface to work comfortably without unwanted mistakes.
As you progress in your skills and experiment with different techniques, you can add more materials to your kit. Consistent practice and experimentation with different tools will help you discover your own style and develop your artistic abilities. Remember that it’s not just about the tools, but the passion and commitment you put into your art that will make your drawings unique!
Types of Lines and Tips for Practice
Lines are fundamental elements in drawing and play a crucial role in creating shapes, details, and expressions in your artwork. Mastering different types of lines and practicing their execution will improve your precision and drawing skills.
Let’s quickly talk about the different types of lines:
- Straight and Curved: The first thing that comes to mind when talking about lines. With them, you can already create a complete drawing.
- Continuous or Broken: Continuous lines are often used for outlining drawings, while broken lines can be used to create textures.
- Thickness: Playing with the thickness of the different types of curves mentioned earlier helps create different effects. Experiment with this to find different styles in your compositions.
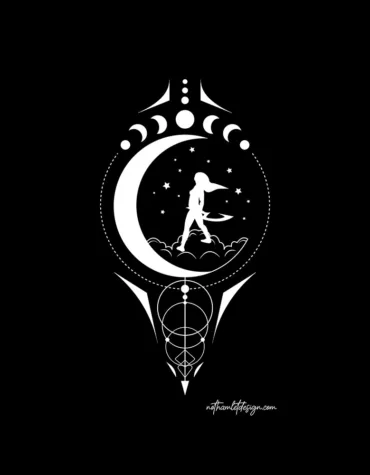
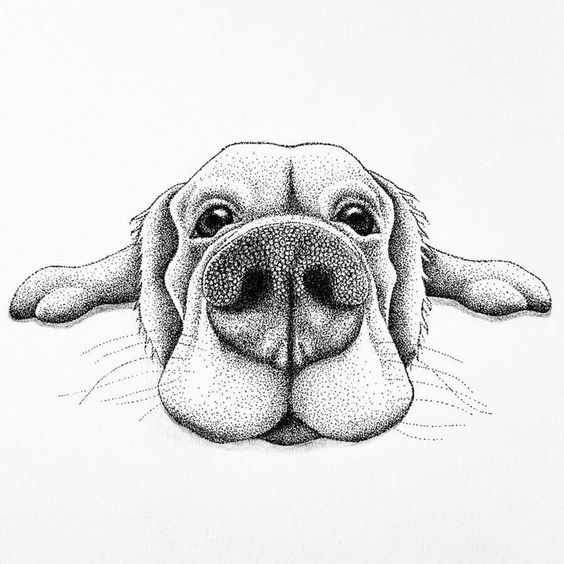
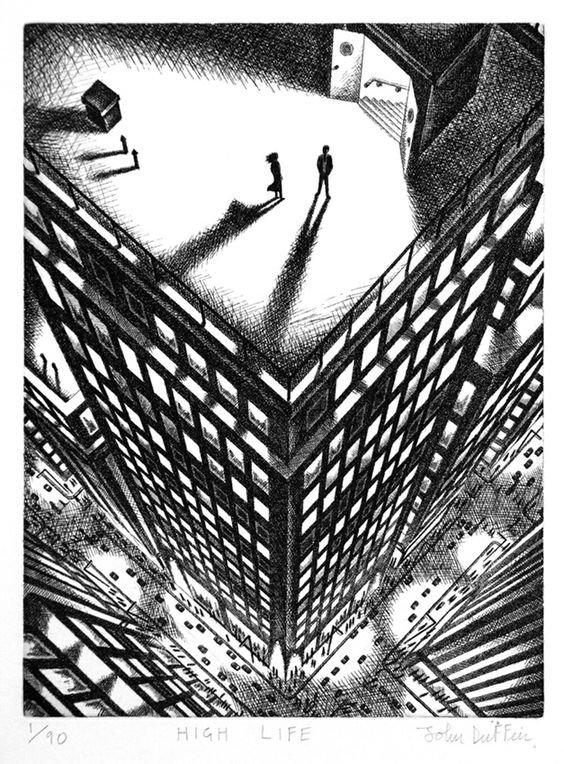
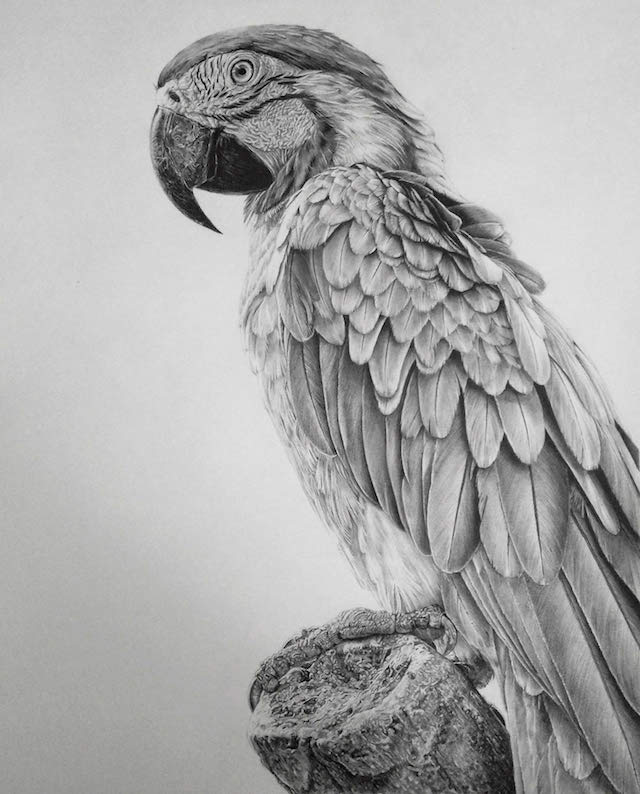
Only with these elements you can create incredible illustrations like this one by @fabio.maria1 .

How to practice lines:
Many sources recommend drawing lines and circles on a sheet of paper every day. It’s a useful exercise, but it can be a bit boring at times. For me, it’s more enjoyable to make quick sketches of anything you see around you. From a spoon to the flower on your balcony, make a quick sketch using swift and fluid lines without worrying too much about precision.
Here is an example to better understand what I mean:
Another useful exercise is drawing patterns or studying references. Drawing patterns involves repeating line patterns, aiming for precision. It’s okay if it’s not perfect; we are practicing!

Doing a study of references is a bit more elaborate. It involves observing photos, illustrations, or images that you like and analyzing how the lines are distributed. The best way is to try to replicate that image and learn where you made mistakes.
Practicing can sometimes become a bit dull, but it helps you progress faster. You need to find ways to make it as enjoyable as possible.
Basic Shading Techniques
Shading is a crucial skill in drawing as it adds depth and realism to your creations. Shadows are often said to give “volume” to drawings.
Let’s mention some basic shading techniques for you to get to know them:
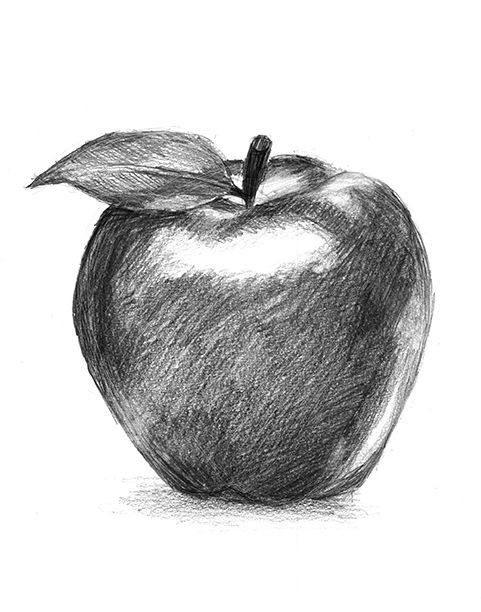
• Pencil Strokes or Pencil Stump: The most commonly used method is shading with a pencil. B-type pencils (darker ones) are usually used to make smooth and uniform strokes in the direction of the shadow. The more pressure you apply to the pencil, the darker the shading will be. You can use a pencil stump or blending tool to blend the strokes and achieve smooth transitions between light and shadow.
• Hatching: This technique involves making parallel and uniform lines in the direction of the shadow. The closer the lines are together, the darker the shading will be.
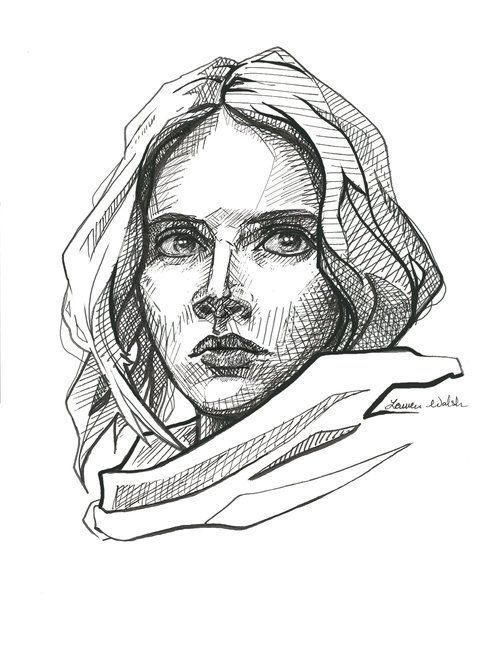
• Cross-Hatching: A variation of hatching where lines are overlapped in different directions. By crossing the lines, a darker tone and an interesting visual effect are created. Different angles and line densities result in various shading effects. It is one of my favorite ways to add shadows to pen drawings.
• Stippling: Consists of creating shadows by applying dots or small marks on the paper. The closer the dots are, the darker the shaded area will be. This technique is ideal for detailed textures and precise shading effects, but it takes a loooot of time.
• Blending: Blending is achieved by using a kneaded eraser or a pencil stump to blend and smooth the pencil strokes. When working digitally, there are different tools that simplify this process.
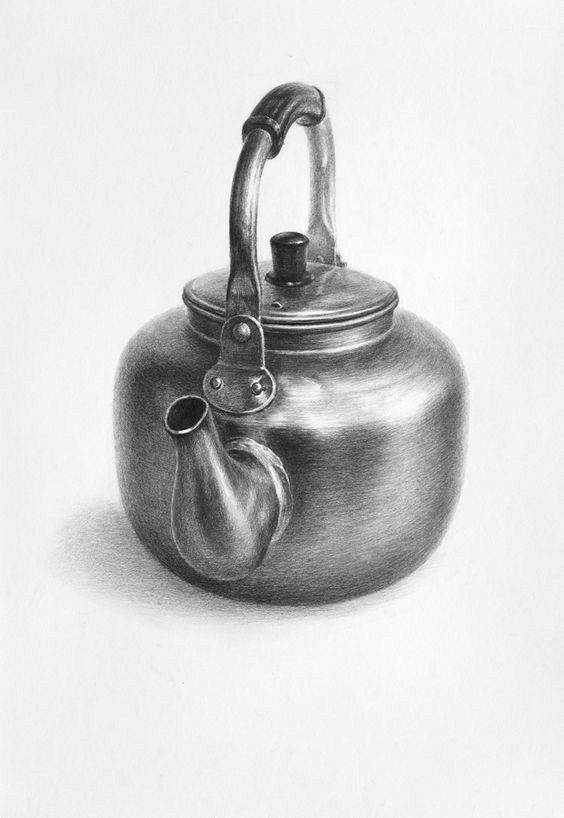
• Chiaroscuro: This technique involves using strong contrasts between lights and shadows to create a dramatic and realistic effect. Let’s take this design that we made recently as an example.

• Gradation: Gradation is a technique to achieve smooth transitions between lights and shadows. It is achieved by gradually applying pencil pressure, starting from a lighter tone and gradually darkening the shaded area. In digital art, there are also tools that simplify this process.
Remember that shading requires patience and practice. Do not be afraid to study and practice shading with real-life objects or photographic references. Observing how light interacts with objects will help you better understand shadows and improve your ability to bring life to your drawings.
Perspective and Depth
Perspective is one of the fundamental elements of drawing that allows creating an illusion of depth and space on a two-dimensional surface. At this point, we will briefly touch on some basic concepts for you to know:
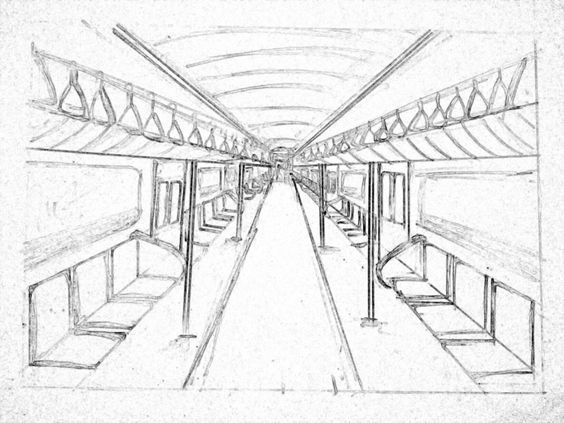
- Linear Perspective: Linear perspective is the most common type and is based on the use of converging lines to create the illusion of depth. Horizontal lines that recede from the viewer converge at a vanishing point on the horizon. The farther an object is, the closer it will be to the vanishing point.
- Point of View: The point of view is the point from which a scene is observed. It can be at eye level, from above, or from below. The point of view affects the perception of the scene and the appearance of objects in perspective.
- Depth of Field: Depth of field refers to the perceived distance between objects in a scene. Objects closer to the viewer appear larger and more defined, while objects farther away seem smaller and less detailed.
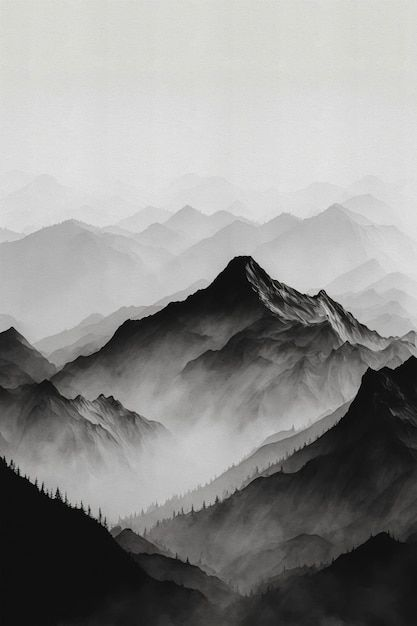
- Aerial Perspective: Aerial perspective refers to the atmospheric effect that occurs as objects move away. Distant objects tend to have softer colors and tones, and they may fade into the horizon due to atmospheric interference.
- Conical Perspective: Conical perspective is applied to objects with a conical shape, such as cylinders and cones.
- Multiple Vanishing Points Perspective: In some compositions, there may be more than one vanishing point to represent objects that are at different angles with respect to the viewer.
Remember that perspective is a skill that develops over time and with practice. I recommend using guide lines to help you create your composition with any type of perspective.
Composition and Framing
The way you arrange elements within your drawing can influence how the artwork is perceived and interpreted as a whole. A well-designed composition can capture the viewer’s attention and create a significant visual impact.
Let’s mention some basic concepts that are good for you to know:
- Focal Point: It is the main element around which other objects will be organized.
- Rule of Thirds: This rule involves dividing your drawing area into nine equal sections as shown in the image. The points of intersection of these lines are strategic places to position the important elements of your drawing (e.g., the focal point).

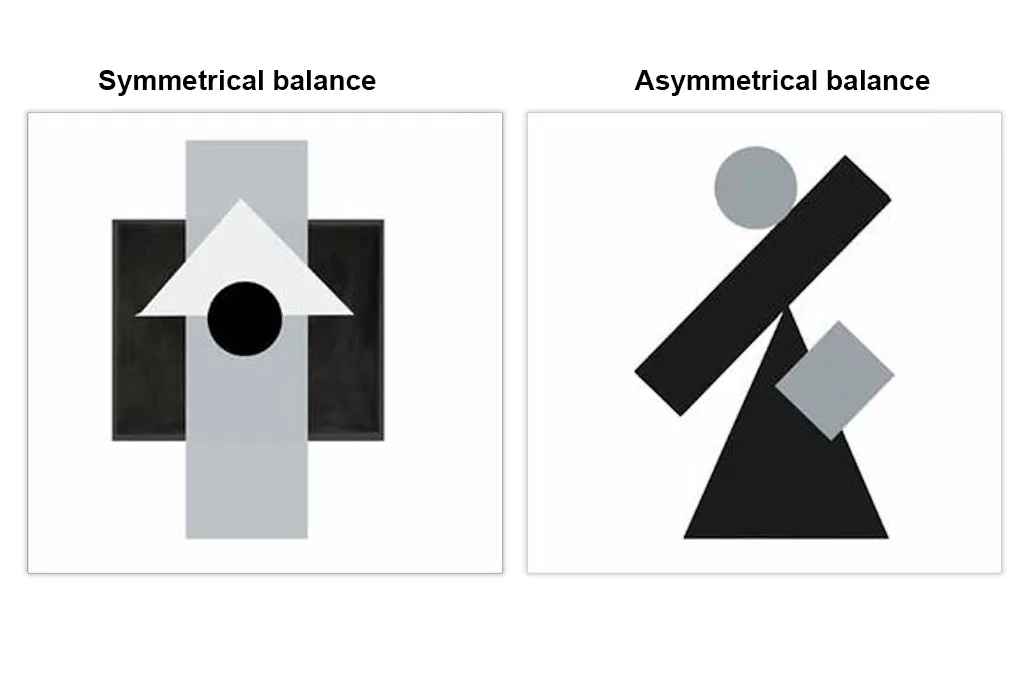
- Balance and Asymmetry: Symmetrical balance creates a sense of calm and stability by dividing the drawing into equal halves. In contrast, asymmetrical balance involves an unequal distribution of elements, which can create a sense of movement and dynamism.
- Visual Hierarchy: Highlight the focal point or main object by making it larger, more detailed, or placing it in a central position. Secondary elements should be less prominent and support the overall narrative of the drawing. Observe how the drawing changes according to the size of the objects and their level of detail.
- Negative Space: Negative space refers to the empty space or background around the main objects in your drawing.
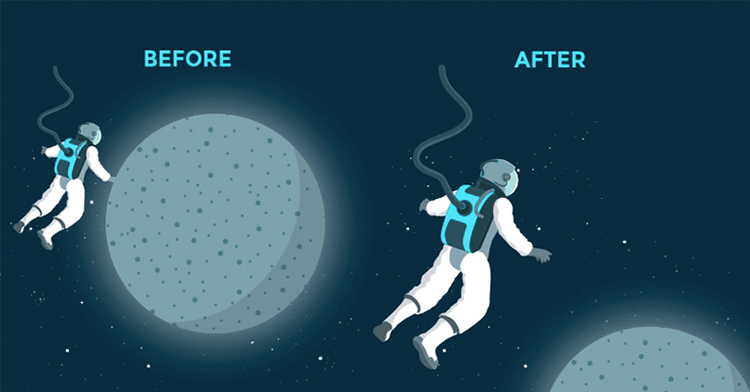
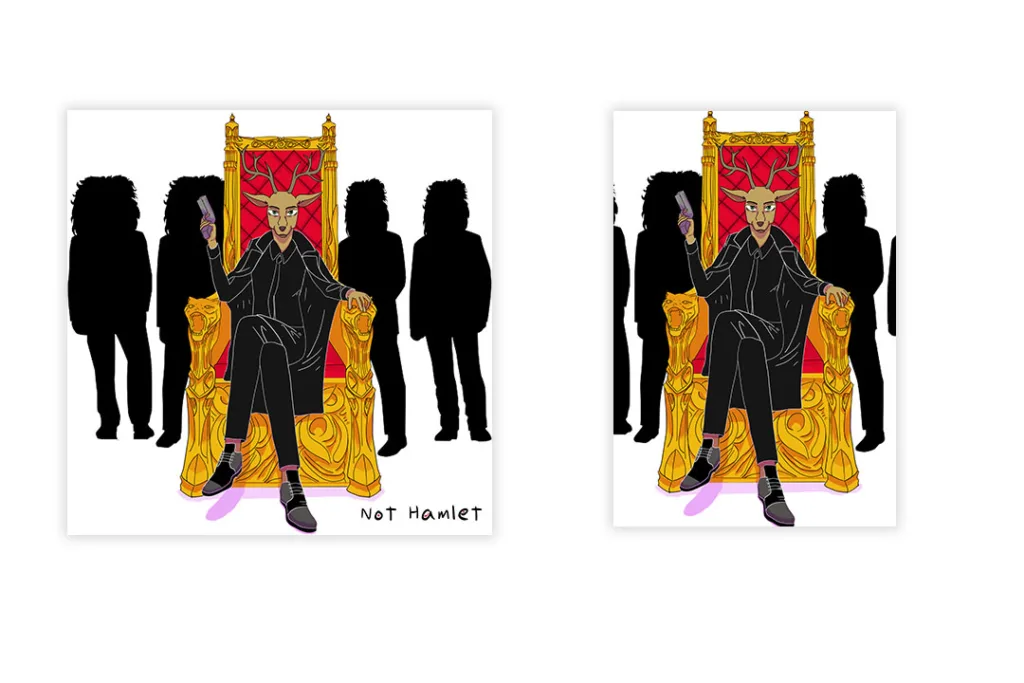
- Framing: Framing refers to the boundaries or limits of the drawing. It is the proportion of the image you want to show. It is very important for the final result. In this example, you can see how it changes.
Remember that composition and framing are subjective aspects of art, and there is no definitive formula for achieving a perfect composition. With practice and constant observation of works by other artists, you can improve your ability to compose scenes.
Exploring Different Drawing Styles
One of the most exciting aspects of drawing is the opportunity to experiment and develop various artistic styles. Each artist has their own voice and approach, and exploring different styles will allow you to find the one that best suits your personality and skills.
Here are some popular drawing styles that you can explore and develop:
- Realism: Realism focuses on capturing the details and features of objects or subjects as accurately as possible. Realistic drawings resemble photographs and require meticulous observation and mastery of shading and texturing techniques. Practicing realism will improve your observation skills and enable you to create incredibly detailed and vivid drawings.
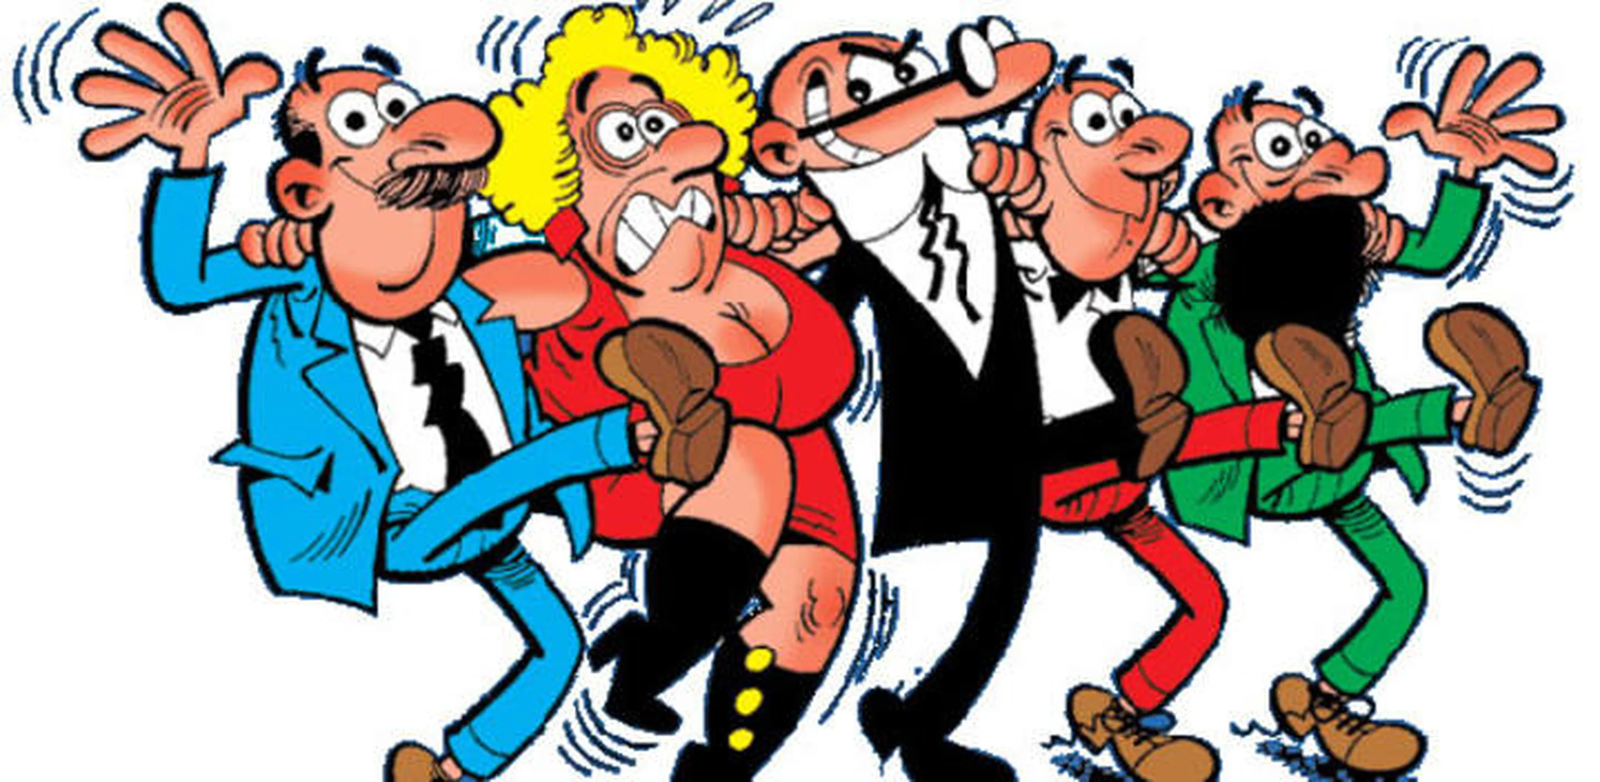
- Caricatures: Caricatures are an exaggerated and stylized representation of people or objects that highlight distinctive traits and characteristics. This style allows you to play with creativity and humor and is an excellent way to develop your sense of design and artistic expression. Our logo is a good example. As a tribute, I add the cartoons that F. Ibáñez used to create, an important Spanish artist who recently passed away.
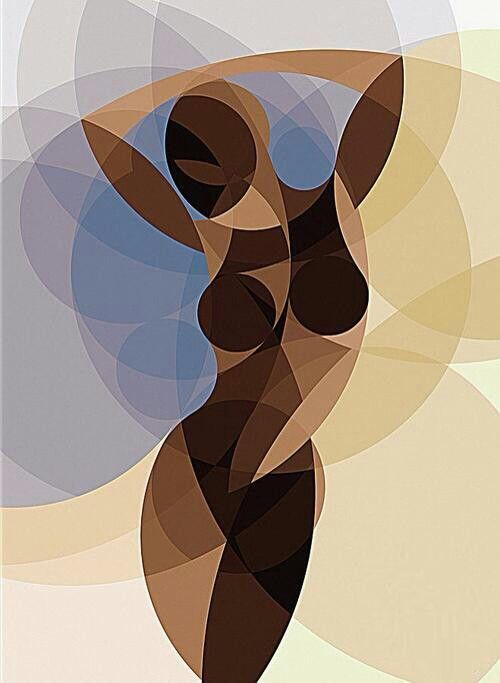
- Abstract Drawing: Abstract drawing focuses on representing ideas and emotions rather than concrete objects or subjects. You can use shapes, colors, and lines to express abstract concepts and experiment with creative freedom without limits.
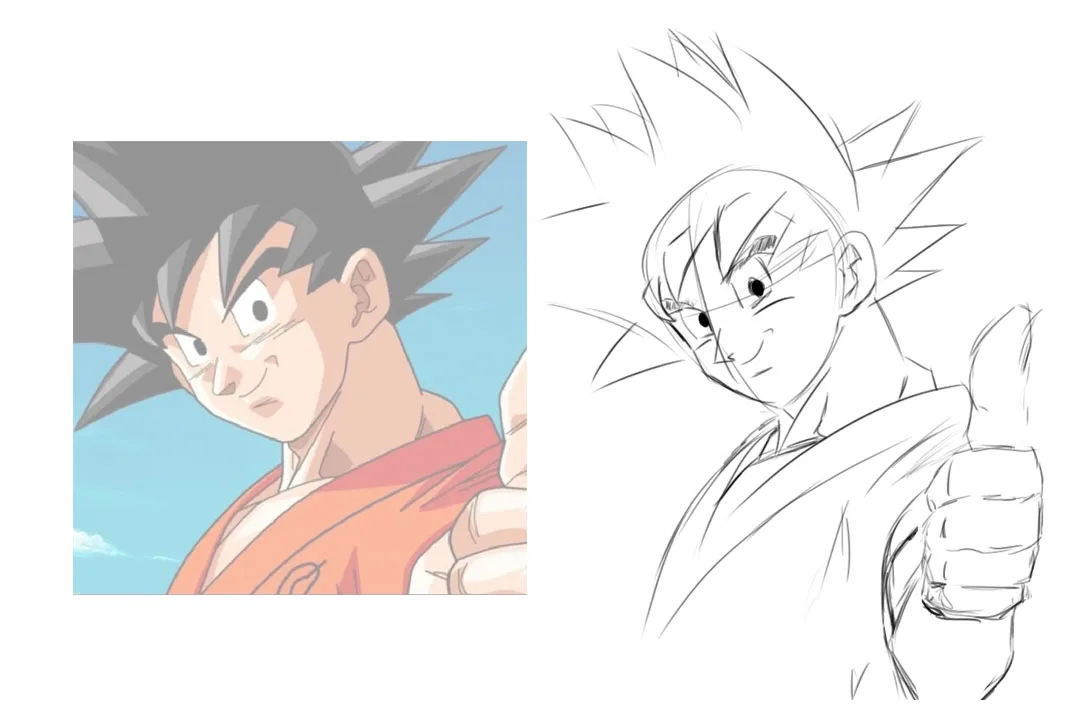
- Manga/Anime: This style has become very popular nowadays, and it’s highly recommended for beginners. It allows for beautiful results and is known for its expressive and unique characters.

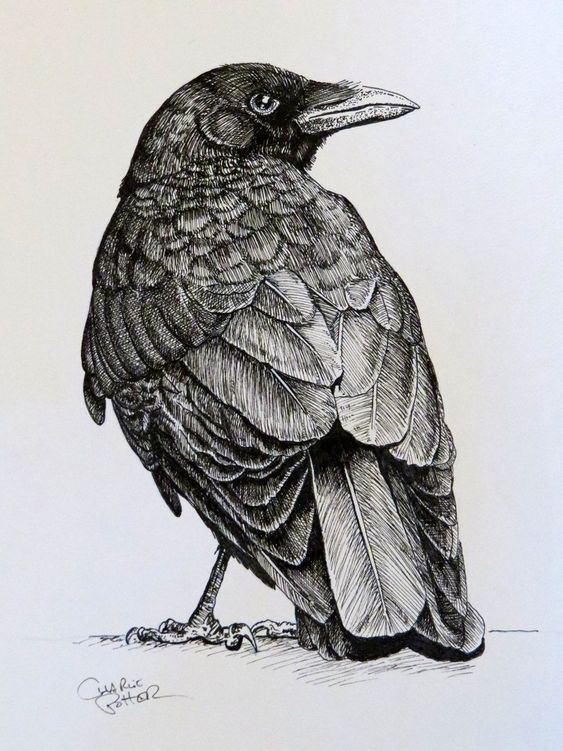
- Pen and Ink Drawing: Pen and ink drawing is characterized by defined lines and expressive strokes created with ink pens. This style is ideal for creating detailed and expressive drawings, and it will help you develop a steady and confident hand in your strokes. It’s one of my favorites. In my Instagram stories, you will occasionally see this style of drawings.
Remember that there are no limits in artistic exploration, and you can combine elements from different styles to create your own unique approach.
Practice and Patience: The Path to Improvement in Drawing
Becoming a skilled artist in drawing is not a sprint, but a marathon that requires constant practice and patience. As you delve into the world of drawing, it’s common to have moments where you may feel frustrated or discouraged. However, the key to overcoming these obstacles and improving your skills lies in perseverance and dedication.
Practice helps you in many ways. It helps you continuously develop your skills, teaches you to overcome challenges, and allows you to discover new techniques and styles.
Most importantly, don’t forget that if you don’t enjoy the process, the result won’t be as rewarding.
Conclusion
Remember that the art of drawing is a unique journey for each individual, and there is no final destination. Practice and patience are the keys to keep moving forward and improving as an artist. Enjoy the process, have fun experimenting, and don’t be afraid to explore new artistic horizons. With determination and dedication, you will reach new heights in your drawing skills and, above all, find deep satisfaction in expressing your creativity.
Don’t forget that you can find our social media links below, where you can share your drawings with us. You can also ask us anything you want. I hope this post has been helpful to you. Keep drawing, and never stop creating!